In this article, we will look at how to create/configure volume on PowerStore using PowerStore Manager.
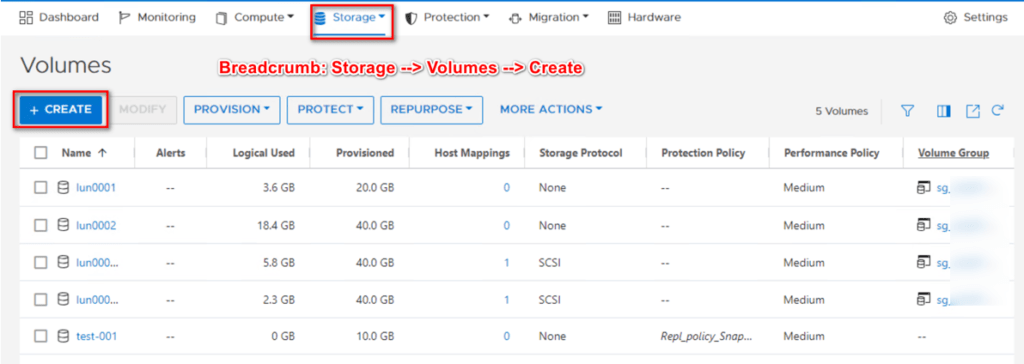
Step 1
Click +Create button to create a new Volume.
Step 2
Use the following settings and leave all other fields as default:
- Name: As per the naming convention
- Description: Optional
- Size and Quantity: As desired
- Placement: You can place the volume in an appliance that is shown in the drop-down list, or allow the system to place the volume automatically. The placement option is not visible in the screenshot below because of a scrollbar. But it will be available to you while creating the volume.
Click Next
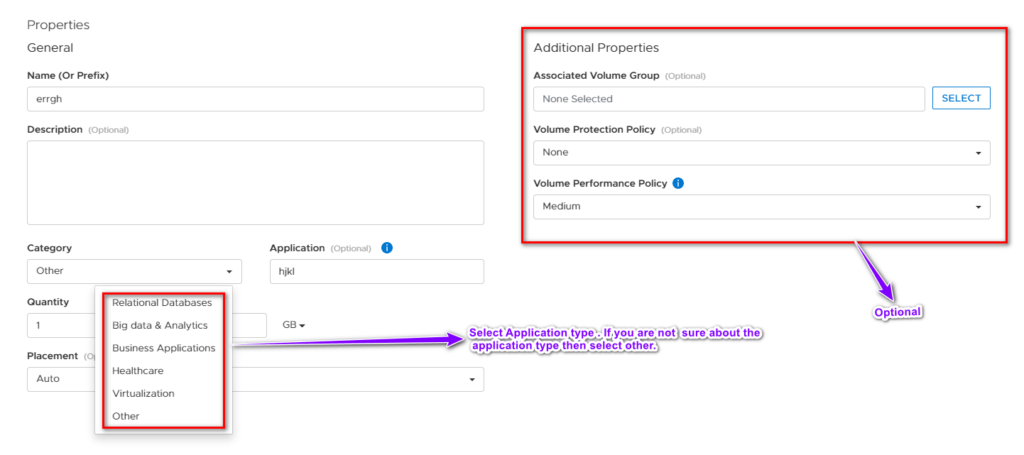
More Information on Additional Properties:
Associated Volume Group (optional): Volume Group allows single point of management for volumes and as the name suggests it groups related volumes together so that common operations can be performed on them simultaneously. It also helps in maintaining consistency across multiple volumes. If you would like to add the volume to a volume group that will be created in this step then please ensure that a volume group already exists.
Note (Limitation): All volumes in the volume group should be on the same appliance.
Volume Protection Policy (Optional): If you would like to protect this volume using Snapshot or replication then select the appropriate protection policy from this pane. Please note, this can always be done later and that is why its an optional step.
Volume Performance Policy (Optional): When there is competition for resources at the system level, adjust the performance profile on volumes to service IOPS. Limit I/O bandwidth and throughput to deliver more stable performance. Choose a performance policy that takes the I/O priority into account (High, Medium, or Low).
Note: Data Reduction (Compression and Deduplication) is always on and cannot be disabled.
Step 3
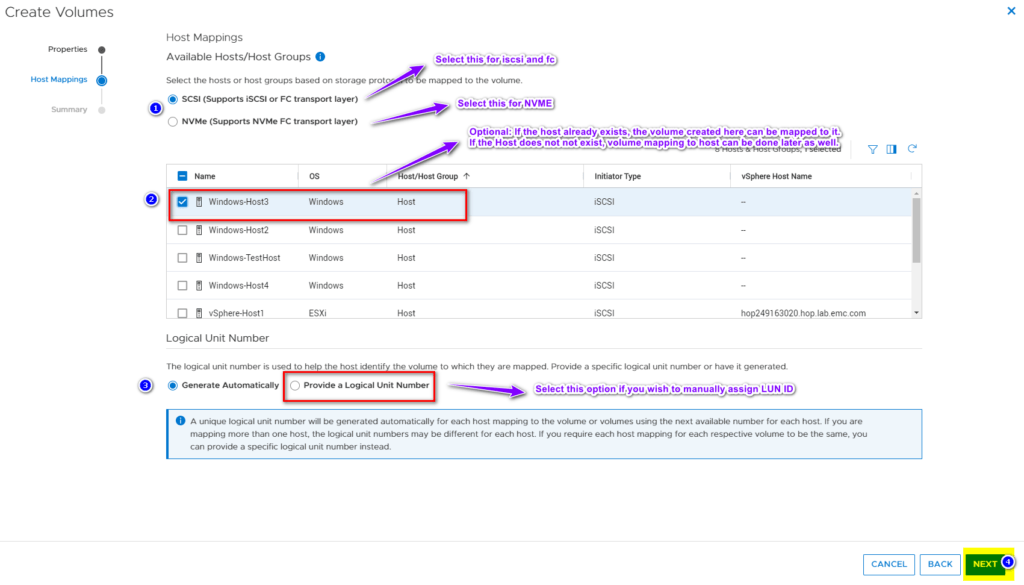
If you have already created a host then you can map the volume to the host at this stage or you can skip this step and perform the mapping operation later.
If the host is selected at this stage then you will also get the option of assigning LUN (Logical Unit Number) id at this stage.
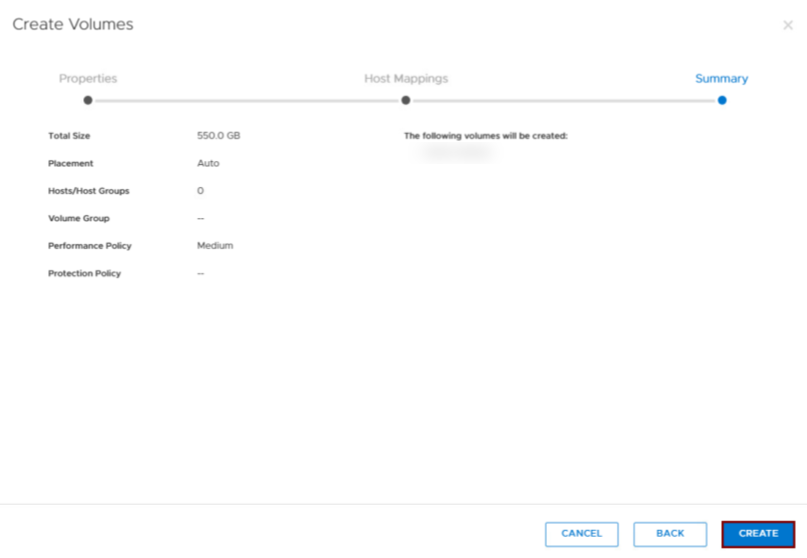
Step 4
Please verify the summary step and if everything looks good, click on create.