In this article, we will look at how to add an iSCSI host to a PowerStore appliance using PowerStore Manager. We will also look at some of the important best practices that we ought to follow. These best practices are recommended by DELL EMC and should be followed to the letter T so you don’t have availability and redundancy issues in your production SAN.
iSCSI Recommendation for PowerStore
- Create 4 target iSCSI IP addresses (2 per Node) on two different subnets.
- Recommended not to use routing on iSCSI.
- Use 2 separate fabrics.
- Connect all hosts to both nodes of each PowerStore Appliance.
- Do not configure custom bonds for block services.
- Recommended Max Path per Volume: 8
PowerStore Ethernet Ports – iSCSI
PowerStore optical Ethernet ports support speeds of up to 25 Gb/s, based on the SFP that is used. Copper Ethernet ports support speeds of up to 10 Gb/s. Because higher speeds allow for greater MBPS and IOPS capabilities, it is recommended that you use the highest speed supported by your environment. With PowerStoreOS 3.0, a new 2-Port Ethernet card is introduced that supports speeds of up to 100 Gb/s. This 100 GbE card is supported on PowerStore 1000-9200 models in I/O Module 0 slot.
Jumbo frames (MTU 9000) are recommended for increased network efficiency. Jumbo frames must be supported on all parts of the network between PowerStore and the host. Ethernet ports for iSCSI Map additional Ethernet ports for iSCSI to increase system MBPS capabilities. Enable Jumbo frames for iSCSI by setting the Cluster MTU to 9000, and setting the storage network MTU to 9000.
The embedded module 4-port card and the optional network I/O modules are 8-lane PCIe Gen3. When more than two 25 GbE ports are used, these cards are oversubscribed for MBPS. To maximize MBPS scaling in the system, consider cabling and mapping the first two ports of all cards in the system first. Then, cable and map other ports as needed.
Add iSCSI Host to PowerStore using PowerStore Manager: Step by Step
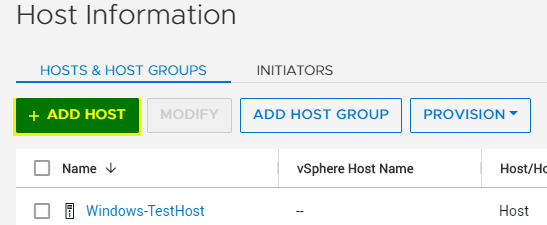
Step 1
- Login to the PowerStore Manager.
- Navigate to Compute > Hosts Information.
- Click on Add Host
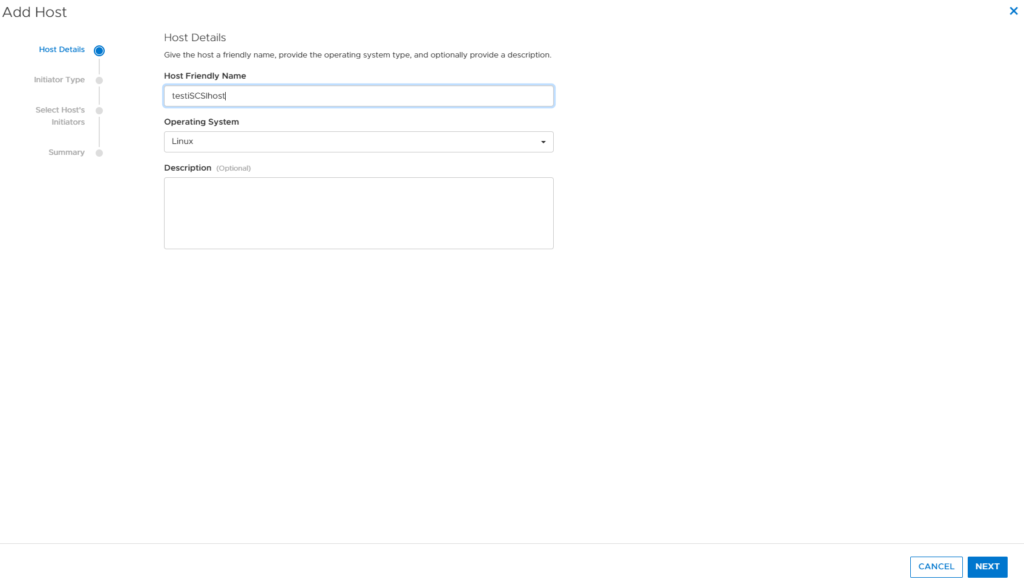
Step 2
Enter the information as stated below and click next.
- Host Friendly Name: Enter the hostname
- Operation System: Select the OS installed on the host.
- Description: Optional
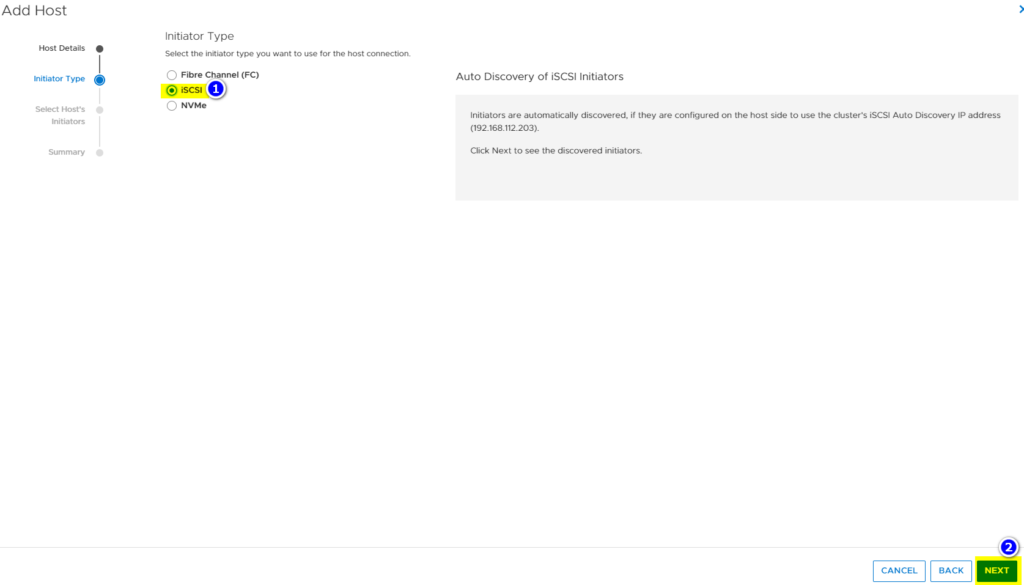
Step 3
Select the Initiator Type as iSCSI as we are adding an iSCSI Host.
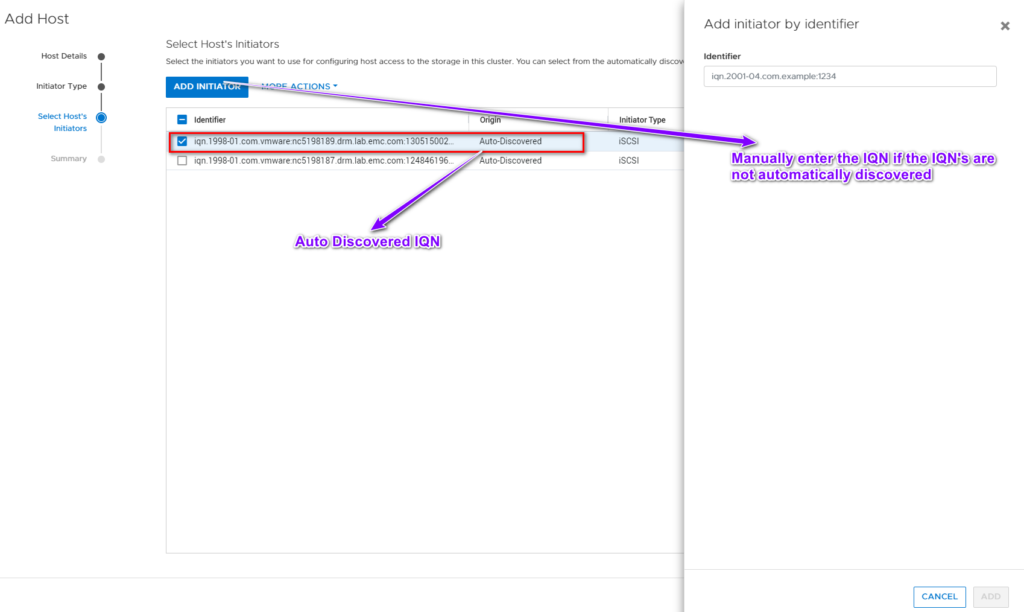
Step 4
- Select the auto-discovered IQNs that belong to your iSCSI host
- Click Next.
- Alternately, if your IQNs are not auto-discovered. Then, click on “Add Initiator, enter the IQN manually and click on ADD button on the slide-out popup.
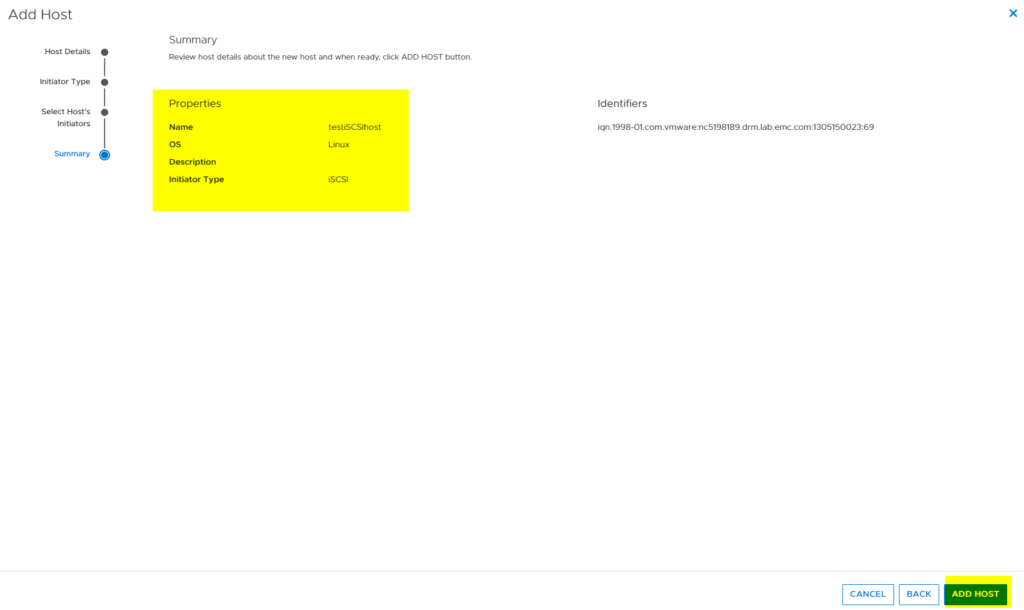
Step 5
- Verify the Information displayed on the screen.
- Click Add Host.