This article will teach how to add or configure a remote connection between the source and destination Dell PowerStore systems. This connection replicates (async or metro) data between the two systems and keeps everything in sync.
What is a remote system in Dell PowerStore?
In PowerStore, the remote system is a second Dell PowerStore system to which the data will be replicated. To allow the replication process possible, a remote connection is needed between the source and destination PowerStore systems.
In PowerStore, the remote system connection is associated with the replication rule. It can be created while creating the replication rule or even before that. The remote systems in Dell PowerStore are visible in PowerStore Manager by navigating to Storage >> remote systems.
NOTE: If Jumbo frames are being used in your infra, then make sure both source and destination PowerStore have the same setting configured along with all the network ports that the frame will traverse to and from. Do not change the Jumbo Frame setting on the fly. First, pause the replication session and then change the MTU and then run verify and update.
Prerequisites needed before we start
- Source and Destination Dell PowerStore systems IP Address
- Admin Credentials of Source and Destination PowerStore systems
Replication Data Network
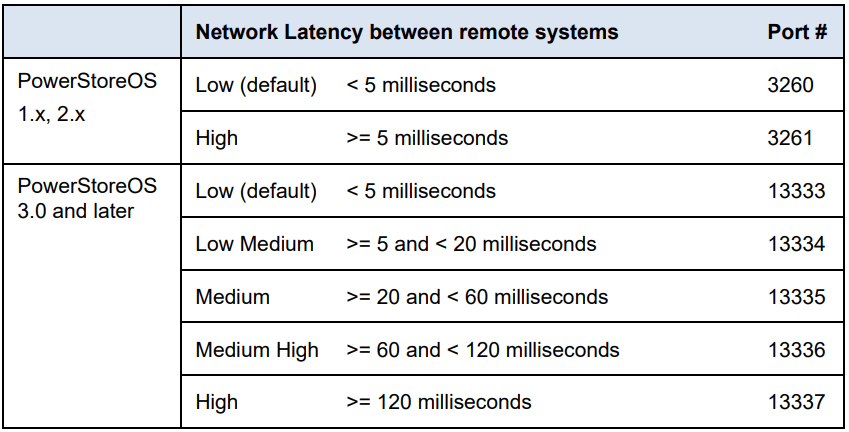
PowerStoreOS 3.0 and later leverages a TCP-based protocol for replication data traffic relies on the iSCSI protocol.
Each latency category uses a different network port number. For replication across network borders, it might be required to adjust network ACL or network firewall rules to allow replication traffic.
Add a Remote System Connection in Dell PowerStore: Stey by Step
Step 1
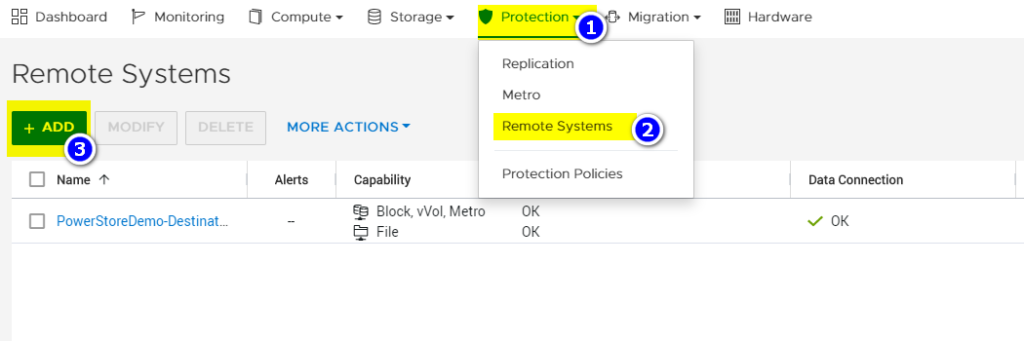
- Login to the PowerStore Manager
- Navigate to Protection >> Remote Systems
- Click on Add Button
Step 2
In the slide-out panel, provide the information mentioned below:
- Type: PowerStore is the default selection, as we can only replicate data to and from the PowerStore system.
- Management IP Address: Enter Remote PowerStore system management IP
- Network Latency: low (<5 ms) default selection
- Username and Password: Enter the username and password configured on the remote PowerStore system. (Admin)
Click on Add
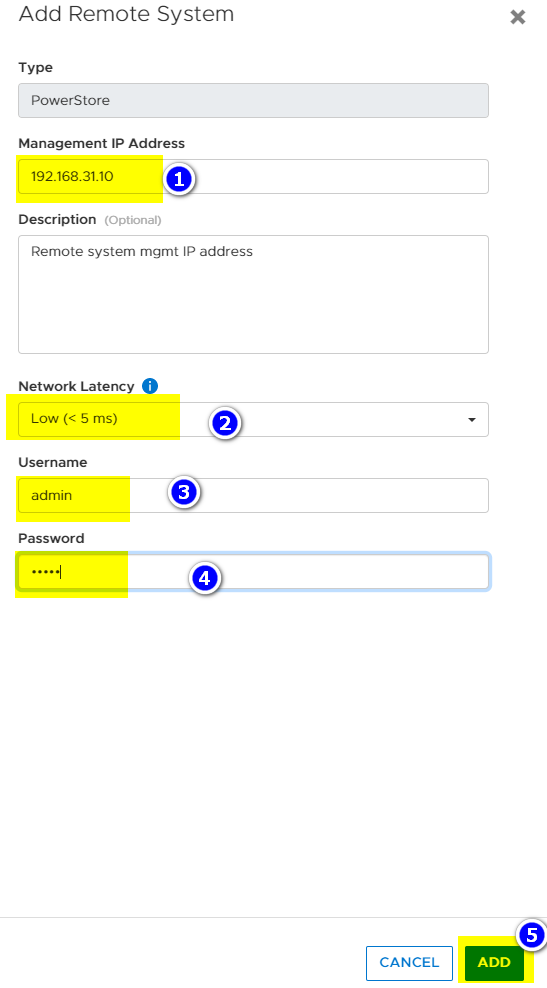
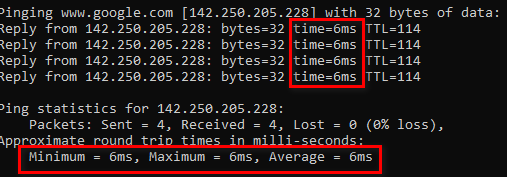
NOTE: If the network latency is unknown, you can use ping to find this out.
Step 3
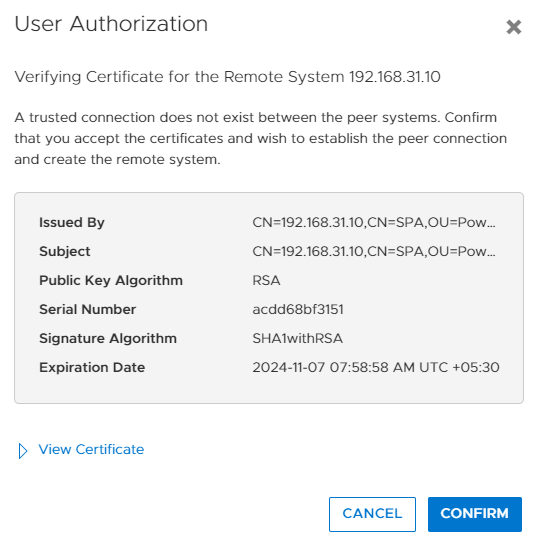
- Another popup will appear to confirm the certificate for the remote system
- Click Confirm
Step 4
After the configuration task is finished, the new remote system is listed on both sides. Initially, the data connection will be in initializing state but will soon return ok state.

Alternate Track to connect Remote System
- Navigate to the Protection Policy in the Dell PowerStore system
- Select the Protection Policy that needs a replication rule to be created
- Click on Modify
- Click on Create Replication Rule
- In the slide-out panel, Click on Setup new destination
- Complete the remote system configuration detail and click on ADD
